Installing and Starting Zope
By the end of this chapter you should be able to install and start Zope. It's fairly easy to install Zope on most platforms, and it should typically take you no longer than ten minutes.
Downloading Zope
Zope Corporation makes "binaries" which are available on Zope.org for the Windows, Linux and Solaris operating systems. These binaries are "ready-to-run" releases of the Zope application server that do not require compilation.
There are typically two types of Zope releases: a "stable" release and a "development" release. The "stable" Zope release is always available as a binary distribution for supported platforms. The "development" Zope release may or may not be distributed as a binary for any given platform. If you are new to Zope, you almost certainly want to use the "stable" Zope release.
You may download Zope from the Zope.org web site. The most recent stable and development versions are always available from the Download area of the Zope.org website.
For platforms for which there is no binary release, you must download the Zope source and compile it. Zope may be compiled on almost any Unix-like operating system. Zope has reportedly been successfully compiled on Linux, FreeBSD, NetBSD, OpenBSD, Mac OS X, HPUX, IRIX, DEC OFS/1, and even Cygwin (the UNIX emulation platform for Windows). As a general rule of thumb, if Python is available for your operating system, and you have a C compiler and associated development utilities, then you can probably compile Zope. A notable exception is Mac OS 7/8/9. Zope does not run at all on these platforms.
Installing Zope
Zope requires different installation steps depending on your operating system platform. The sections below detail installing the binary version of Zope on Windows on Intel platforms, Solaris on SPARC platforms, and Linux on Intel platforms. We also detail a installation from source for platforms for which Zope Corporation does not provide a binary distribution.
Various binary Zope packages exist that are not distributed by Zope Corporation, but instead are distributed by third parties. Provided here is a list of URLs to these below for convenience's sake. These packages are not directly supported by Zope Corporation, although Zope Corporation encourages alternate binary distributions for unsupported platforms by third parties.
Zope is also available from many Linux distributors as a "native" package. For example, RedHat often ships Zope on its "PowerTools" CD as an RPM. Check with your Linux operating system vendor to see if there are native Zope packages available for your platform.
Installing Zope for Windows With Binaries from Zope.org
The "Win32" version of Zope works under Windows 95, Windows 98, and Windows ME, Windows NT, Windows 2000, and Windows XP. Zope for Windows comes as a self-installing .exe file. To install Zope, first, download the Win32 executable installer from the Download area on Zope.org. It is typically named something like "Zope-2.X.X-win32-x86.exe" where the "X"s refer to the current Zope version number.
Important note: Do not try to use the file named "Zope-2.X.X-to-2.X.X-win32.x86.tgz" to install Zope for the first time. This is an upgrade package which upgrades an older version of Zope to a newer one instead of an installable Zope distribution.
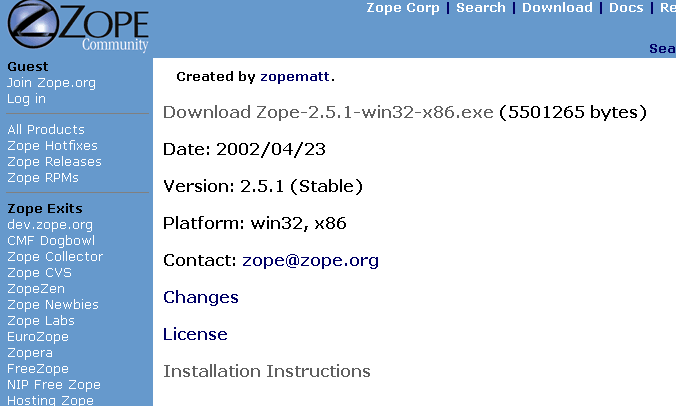
Figure 2-1 Current stable Windows Zope Release
Download the current stable release installer for Windows from Zope.org using your web browser. Place the file in a temporary directory on your hard disk or on your Desktop. Once the installer file has been downloaded, navigate to the folder in which you downloaded the file to, and double-click on the file's icon. The installer then begins to walk you through the installation process.
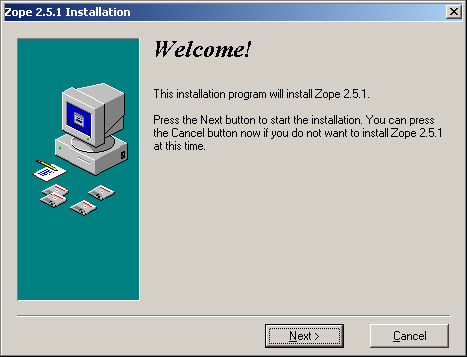
Figure 2-2 Beginning the installer
Click Next. You are asked to accept the Zope Public License before installing the product. After you read and accept the license, click Next again. Since you can install more than one Zope instance on any given machine, you are asked to pick a unique "site name" for your Zope instance. The default name is "WebSite". It's recommended that you change this value. "Zope" is a reasonable name, although you are of course free to pick any name you choose.
Click Next after choosing your site's name. You are then asked to choose a directory in which to install Zope. A reasonable choice for a destination directory is "c:\Program Files\Zope". After filling in the directory name, click Next. You will be prompted to create a new Zope user account. This is not an operating system account. It is a user account that is only meaningful to Zope. The account that you specify is called the initial user (or "superuser") and is used to log into Zope for the first time. It is also given Zope administrative privileges. You can change this user name and password later if you wish. A reasonable choice for the initial user name is "admin".

Figure 2-3 Selecting a Site Name
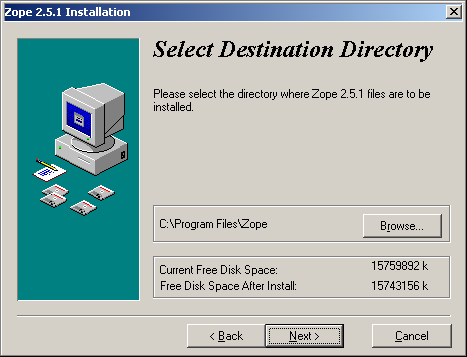
Figure 2-4 Selecting a Destination Directory
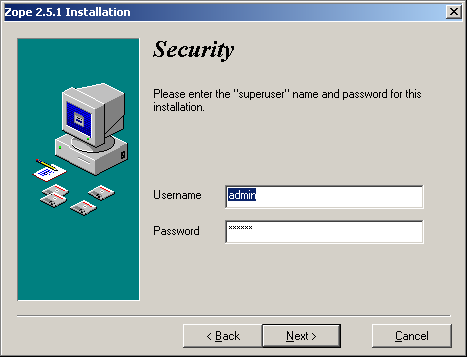
Figure 2-5 Provide an initial username and password
Click Next after choosing the initial user name and password. The installer presents a dialog indicating that it is ready to install files. Click Next again to begin installing the files.
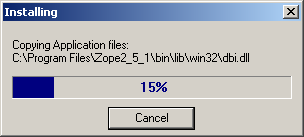
Figure 2-6 Installing files
Once the file copy is finished, if you are using Windows NT, Windows 2000, or Windows XP, you will see a dialog that indicates that you may choose to run Zope as a service. If you are just running Zope for personal use, don't bother running it as a service. If you are running Windows 95, Windows 98, or Windows ME, you cannot run Zope as a service (it is not offered as an option). It is recommended that if you are installing Zope for the first time that you don't choose to run the server manually.
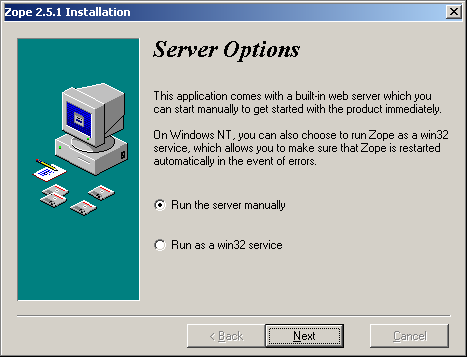
Figure 2-7 Server Options
After you click "Next", the installer informs you that the installation was successful. Click "Finish". If you decide to uninstall Zope later you can use the Unwise.exe program that resides in the directory in which you chose to install Zope.
Note that the Zope installer does not add a program folder entry to your "Start" menu. You will see how to start Zope in an upcoming section.
Installing Zope on Linux and Solaris With Binaries from Zope.org
The binary installations of Zope on Linux and Solaris are very similar. The binary distribution of Zope for Linux and Solaris comes as a .tgz file which must be uncompressed before you are able to begin the installation.
Important note: Do not try to use the file named "Zope-2.X.X-to-2.X.X-platform.tgz" to install Zope for the first time. This is an upgrade package which upgrades an older version of Zope to a newer one instead of an installable Zope distribution.
This paragraph has material that only applies to Solaris users. Before attempting to install Zope on Solaris for the first time, you need to install "GNUtar" and "gunzip". Both packages are available from the Solaris Package Archive. GNUtar is a "tape archive" program which, unlike the standard Solaris "tar" program is able to handle long file paths. Although Solaris comes with its own "tar" program, it is unable to handle unpacking Zope because it has a lame filepath-length limit that is exceeded by the length of some of the paths in the install package. "gunzip" is the GNU Lempel-Ziv encoding "unzip" program. Most, if not all, Linux versions come with GNUtar as the default "tar" program and already have gunzip installed, so if you run Linux, don't worry about this.
To begin a Zope installation, download the required installation archive from the Download area on Zope.org. It is typically named something like "Zope-2.X.X-solaris-sparc.tgz" (for Solaris) or "Zope-2.X.X-linux2-x86.tgz" (for Linux) where the "X"s refer to the current Zope version number.
After you download the installation archive for your platform, but before you install Zope, it is important that you decide where you'd like to install Zope and which user will be used to run it. It is suggested that Zope be unpacked and run as a "normal" user (any user except the root user). Though you may of course create a "dedicated" Zope user account, we're going to assume you want to install it in a subdirectory of your own personal "home" directory for the purpose of these instructions.
Download the most recent stable binary installation archive for your platform into your user's "home" directory. Below we show a user using "wget" for this purpose, but you may download it via any web browser:
        chrism@saints:~$ wget http://old.zope.org/Products/Zope/2.5.1/Zope-2.5.1-linux2-x86.tgz
        --20:27:56--  http://old.zope.org:80/Products/Zope/2.5.1/Zope-2.5.1-linux2-x86.tgz
                   => `Zope-2.5.1-linux2-x86.tgz.1'
        Connecting to old.zope.org:80... connected!
        HTTP request sent, awaiting response... 200 OK
        Length: 5,979,458 [application/x-gzip]

            0K -> .......... .......... .......... .......... .......... [  0%]
           50K -> .......... .......... .......... .......... .......... [  1%]
        (..and so on..)
Note that unlike most other UNIX programs, the Zope installer does not distinguish between a "build" directory and a "install" directory. The "build" directory is the "install" directory and vice versa. This means that the place where you unpack Zope and in which you run the installer should be the place where you want it to ultimately live. In our example case below, we're choosing to both unpack and install Zope into /home/chrism/Zope-2.5.1-linux2-x86.
"cd" to your home directory and, using gunzip and GNUtar, extract the files from the .tgz archive you downloaded in the last step:
        chrism@saints:~$ gunzip -c Zope-2.5.1-linux2-x86.tgz | tar xvf -
        Zope-2.5.1-linux2-x86/
        Zope-2.5.1-linux2-x86/Extensions/
        Zope-2.5.1-linux2-x86/Extensions/README.txt
        Zope-2.5.1-linux2-x86/LICENSE.txt
        Zope-2.5.1-linux2-x86/README.txt
        (.. and so on..)
This will unpack Zope into a new directory named "Zope-2.X.X-osname-platformname" where the X's represent the current Zope version numbers, "osname" represents your OS name, and "platformname" represents your hardware platform name. "cd" to this Zope directory and run the Zope installer script. The command and output are shown below:
        chrism@saints:~$ cd Zope-2.5.1-linux2-x86
        chrism@saints:~/Zope-2.5.1-linux2-x86$ ./install
        ------------------------------------------------------------------
        Compiling python modules
        ------------------------------------------------------------------
        ------------------------------------------------------------------
        creating default inituser file
        Note:
                The initial user name and password are 'admin'
                and 'tnLQ6imA'.

                You can change the name and password through the web
                interface or using the 'zpasswd.py' script.

        chmod 0600 /home/chrism/Zope-2.5.1-linux2-x86/inituser
        chmod 0711 /home/chrism/Zope-2.5.1-linux2-x86/var
        ------------------------------------------------------------------
        setting dir permissions
        ------------------------------------------------------------------
        creating default database
        chmod 0600 /home/chrism/Zope-2.5.1-linux2-x86/var/Data.fs
        ------------------------------------------------------------------
        Writing the pcgi resource file (ie cgi script), /home/chrism/Zope-2.5.1-linux2-x86/Zope.cgi
        chmod 0755 /home/chrism/Zope-2.5.1-linux2-x86/Zope.cgi
        ------------------------------------------------------------------
        Creating start script, start
        chmod 0711 /home/chrism/Zope-2.5.1-linux2-x86/start
        ------------------------------------------------------------------
        Creating stop script, stop
        chmod 0711 /home/chrism/Zope-2.5.1-linux2-x86/stop
        ------------------------------------------------------------------

        Done!
        chrism@saints:~/Zope-2.5.1-linux2-x86$
Note that the installer, among other things, will create an "initial" Zope user account with an autogenerated password. Write this username and password down temporarily. You will use this information to log in to Zope for the first time. You can change the initial user name and password later with the zpasswd.py script (see the chapter entitled Users and Security).
You have now successfully installed the Zope binary distribution. For more information on installing the binary distribution of Zope in alternate configurations on UNIX, see the installation instructions in the INSTALL.txt file inside the doc directory of the binary release package. You may additionally find out more about the installer script by running it with the -h (help) switch:
$ ./install -h
Compiling and Installing Zope from Source Code
If binaries aren't available for your platform, chances are good that you will be able to compile Zope from its source code. To do this, however, you first must:
- ensure you have a "C" compiler on your system (GNU gcc is preferred)
- ensure you have a recent "make" on your system (GNU make is preferred)
- install the Python language on your system from source.
Zope is written primarily in the Python language, and Zope requires Python to be able to run at all. Though binary versions of Zope ship with a recent Python, the source Zope distribution does not. Although we try to use the most recent Python for Zope, often the latest Python version is more recent than the version we "officially" support for Zope. For the most recent information on which version of Python you need to compile Zope with, see the release notes on the Web page for each version. Zope versions 2.5 and 2.6 require a Python 2.1 version equal to or greater than 2.1.3. Zope 2.3 and earlier versions require Python 1.5.2. No version of Zope is yet officially compatible with any version of Python 2.2.
You can obtain instructions for downloading, compiling and installing Python from source at the Python.org web site. Some Linux distributions ship with a preinstalled Python 2.1, but you need to be careful when attempting to use a vendor-installed Python to compile Zope. Some of these vendor-supplied Python distributions do not ship the necessary Python development files needed to compile Zope from source. Sometimes these development files are included in a separate "python-devel" package that you may install and use, but sometimes they are not. We recommend, to avoid headaches like this, that you compile and install Python from source if you wish to compile and install Zope from source.
After downloading, compiling, and installing Python from source, download the current Zope source distribution. See the Zope.org Downloads area for the latest Zope source release. Below we use "wget" for the purpose of downloading the source release, although you may of course use any browser or file retrieval utility:
         chrism@saints:~$ wget http://www.zope.org/Products/Zope/2.5.1/Zope-2.5.1-src.tgz
         --20:49:34--  http://www.zope.org:80/Products/Zope/2.5.1/Zope-2.5.1-src.tgz
               => `Zope-2.5.1-src.tgz'
         Connecting to www.zope.org:80... connected!
         HTTP request sent, awaiting response... 200 OK
         Length: 2,165,141 [application/x-gzip]

            0K -> .......... .......... .......... .......... .......... [  2%]
           50K -> .......... .......... .......... .......... .......... [  4%]
          100K -> .......... .......... .......... .......... .......... [  7%]

         (..and so on..)
Then extract the resulting .tgz archive into the place where you want Zope to be installed. Zope has no "build" directory, the "install" directory is the build directory. In the below example, we extract the .tgz directly into our home directory. This is recommended for purposes of this example:
chrism@saints:~$ gunzip -c Zope-2.5.1-src.tgz | tar xvf -
After extracting the .tgz file, "cd" to the resulting directory and, using the Python binary you compiled beforehand, invoke the Python script which compiles Zope. This script is cryptically named "wo_pcgi.py". "wo_pcgi" stands for "without PCGI", an artifact of Zope's web server integration roots, the meaning of which is largely unimportant today.:
        chrism@saints:~$ cd Zope-2.5.1-src
        chrism@saints:~/Zope-2.5.1-src$ python2.1 wo_pcgi.py
        --------------------------------------------------------------------
        Deleting '.pyc' and '.pyo' files recursively under /home/chrism/Zope-2.5.1-src...
        Done.

        --------------------------------------------------------------------
        Compiling python modules
        --------------------------------------------------------------------

        Building extension modules
        cp ./lib/python/Setup20 ./lib/python/Setup

        ------------------------------------------------
        Compiling extensions in lib/python
        cp /home/chrism/lib/python2.1/config/Makefile.pre.in .
        make -f Makefile.pre.in boot PYTHON=
        rm -f *.o *~
        rm -f *.a tags TAGS config.c Makefile.pre python sedscript
        rm -f *.so *.sl so_locations
        VERSION=` -c "import sys; print sys.version[:3]"`; \

        (..and so on until...)

        --------------------------------------------------------------------
        creating default inituser file
        Note:
                The initial user name and password are 'admin'
                and 'w!YzlsDT'.

                You can change the name and password through the web
                interface or using the 'zpasswd.py' script.

        chmod 0600 /home/chrism/Zope-2.5.1-src/inituser
        --------------------------------------------------------------------

        Done!
You've now successfully installed Zope from source code. Note that the compile script, among other things, has created an "initial" Zope user account with an autogenerated password. Write this username and password down. You will use this information to log in to Zope for the first time. You can change the initial user name and password later with the zpasswd.py script (see the chapter entitled Users and Security). The initial user has "administrator" privileges within this Zope instance.
Starting Zope
Zope is managed via a web browser, and Zope contains its own web server (named "ZServer"). A successful Zope startup implies that its web server starts, allowing you to access the Zope management interface via your web browser. You can access Zope's management interface from the same machine on which Zope runs, or you can access it from a remote machine that is connected to the same network as your Zope server.
Zope's ZServer will "listen" for HTTP (web browser, or Hypertext Transfer Protocol) requests on TCP port 8080. If your Zope instance fails to start, make sure you don't have another application running which is already using TCP port 8080.
Zope also has the capability to listen on other TCP ports. Zope supports separate TCP ports for FTP (File Transfer Protocol), "monitor" (internal debugging), WebDAV (Web Distributed Authoring and Versioning), and ICP (Internet Cache Protocol) access. If you see messages which indicate that Zope is listening on ports other than the default 8080 HTTP, don't panic, it's likely normal.
Using Zope With An Existing Webserver
If you wish, you can configure your existing web server to serve Zope content. Zope interfaces with Microsoft IIS, Apache, and other popular webservers.
The Virtual Hosting Services chapter of this book provides rudimentary setup information for configuring Zope behind Apache. However, configuring Zope for use behind an existing webserver can be a complicated task, and there is more than one way to get it done. In the interest of completeness, here are some additional resources which should get you started:
- Apache: see the excellent DevShed article entitled Using Zope With Apache_Side/Zope/ZopeWithApache .
-
IIS: see Connecting IIS to Zope on using IIS with Zope. Also of interest may be the
WEBSERVER.txtfile in your Zope installation'sdocdirectory, and andym's Zope Behind IIS HowTo.
If you are just "getting started" with Zope, note that it is not necessary to configure Apache or IIS (or any other webserver) to serve your Zope pages, as Zope comes with its own webserver. You typically only need to configure your existing webserver if you want to use it to serve Zope pages in a production environment.
Starting Zope On Windows
If you installed Zope to "run manually" (as opposed to installing Zope as a "service"), use Windows Explorer to navigate to the directory into which you installed the Zope instance (typically c:\Program Files\Zope or 'c:\Program Files\WebSite'). Within this directory, find a file called start.bat. Double-click the start.bat icon. A console window will be opened. It will display process startup information.
If you chose to run Zope as a "service" on Windows NT/2000/XP, you can start Zope via the standard Windows "Services" control panel application. A Zope started as a service writes events to the standard Windows Event Log; you can keep track of when your service starts and stops by reviewing your system's Event Log. A Zope instance which has been installed as a "service" can also be run manually by invoking the start.bat file in the Zope installation directory as described above.
Starting Zope on UNIX
Important note: If you installed Zope from an RPM or a another "vendor distribution" instead of installing a Zope Corporation-distributed binary or source release, the instructions below may be not be applicable. Under these circumstances, please read the documentation supplied by the vendor to determine how to start your Zope instance instead of relying on the instructions below.
To start Zope, "cd" into to the directory in which you installed Zope and invoke the shell script named "start". Here is an example of this invocation and its typical output:
      chrism@saints:~$ cd Zope-2.5.1-linux2-x86
      chrism@saints:~/Zope-2.5.1-linux2-x86$ ./start
      ------
      2002-06-28T03:17:02 INFO(0) ZODB Opening database for mounting: '142168464_1025234222.179125'
      ------
      2002-06-28T03:17:02 INFO(0) ZODB Mounted database '142168464_1025234222.179125' at /temp_folder
      ------
      2002-06-28T03:17:17 INFO(0) Zope New disk product detected, determining if we need to fix up any ZClasses.
      ------
      2002-06-28T03:17:17 INFO(0) ZServer HTTP server started at Thu Jun 27 23:17:17 2002
              Hostname: saints
              Port: 8080
      ------
      2002-06-28T03:17:17 INFO(0) ZServer FTP server started at Thu Jun 27 23:17:17 2002
              Hostname: saints
              Port: 8021
      ------
      2002-06-28T03:17:17 INFO(0) ZServer PCGI Server started at Thu Jun 27 23:17:17 2002
              Unix socket: /home/chrism/Zope-2.5.1-linux2-x86/var/pcgi.soc
Starting Zope As The Root User
ZServer (Zope's server) supports setuid() on POSIX systems in order to be able to listen on low ports such as 21 (FTP) and 80 (HTTP) but drop root privileges when running; on most POSIX systems only the root user can do this. Versions of Zope prior to 2.6 had less robust versions of this support. Several problems were corrected for the 2.6 release.
The most important thing to remember about this support is that you don't have to start ZServer as root unless you want to listen for requests on "low" ports. In fact, if you don't have this need, you are much better off just starting ZServer as a user account dedicated to running Zope. nobody is not a good idea for this user account; see below.
If you do need to have ZServer listening on low ports, you will need to start z2.py as the root user, and also specify what user ZServer should setuid() to. Do this by specifying the -u option followed by a username or UID, either in the start script or on the z2.py command line. The default used to be nobody; however if any other daemon on a system that ran as nobody was compromised, this would have opened up your Zope object data to compromise.
You must also make sure the "var" directory is owned by root, and that it has the sticky bit set. This is done by the command 'chmod o+t var' on most systems. When the sticky bit is set on a directory, anyone can write files, but nobody can delete others' files in order to rewrite them. This is necessary to keep others from overwriting the PID file, tricking root into killing processes when stop is run.
Your Zope Installation
To use and manage Zope, you'll need a web browser. Zope's management interface is written entirely in HTML, therefore any browser that understands modern HTML allows you to manage a Zope installation. Mozilla, and any 3.0+ version of Microsoft Internet Explorer or Netscape Navigator will do. Other browsers that are known to work with Zope include Opera, Galeon, Konqueror, OmniWeb, Lynx, and W3M.
Start a web browser on the same machine on which you installed Zope and visit the URL http://localhost:8080/. If your Zope is properly installed and you're visiting the correct URL, you will be presented with the Zope "QuickStart" screen.
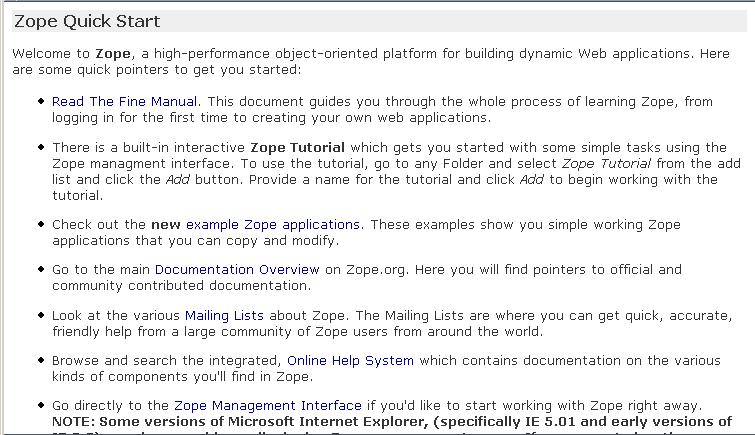
Figure 2-8 Zope QuickStart
If you see this screen, congratulations! You've installed Zope successfully. If you don't, see the Troubleshooting section below.
Logging In
To do anything remotely interesting with Zope, you need to use its "management interface". Zope is completely web-manageable. To log into the Zope management interface, use your web browser to navigate to Zope's management URL. Assuming you have Zope installed on the same machine from which you are running your web browser, the Zope management URL will be http://localhost:8080/manage.
Successful contact with Zope using this URL will result in an authentication dialog. In this dialog enter the "initial" username and password you chose when you installed Zope. You will be presented with the Zope Management Interface (ZMI).

Figure 2-9 The Zope management interface.
If you do not see an authentication dialog and the Zope Management interface, refer to the Troubleshooting section of this chapter.
Controlling the Zope Process With the Control Panel
When you are using the ZMI, you can use the Zope Control Panel to control the Zope process. Find and click the **Control_Panel** object in ZMI.
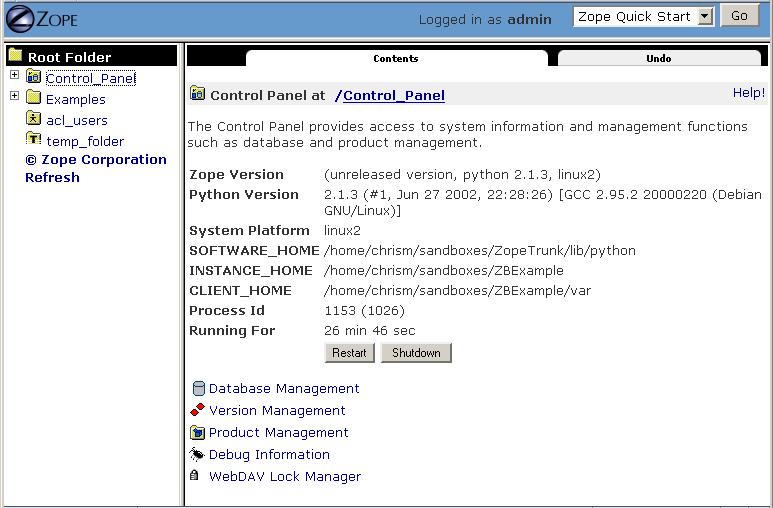
Figure 2-17 The Control Panel
The Control Panel displays information about your Zope, such as the Zope version you're running, the Python version that Zope is using, the system platform, the "SOFTWARE_HOME" (your Zope directory), the "INSTANCE_HOME" (typically the same as your zope home), your "CLIENT_HOME" directory (the "var" directory of your Zope), Zope's process id, and how long Zope has been running for. Several buttons and links will also be shown.
If you are running Zope on UNIX or as a service on Windows, you will see a button in the Control Panel named Restart. If you click the Restart button, Zope will shut down and then immediately start up again. It may take Zope a few seconds to come back up and start handling requests. You needn't shut your web browser down and restart it to resume using Zope after pressing Restart, just wait for the Control Panel display to reappear.
To shut Zope down from the ZMI, click the Shutdown button. Shutting Zope down will cause the server to stop handling requests and exit. You will have to manually start Zope to resume using it. Shut Zope down only if you are finished using it and you have the ability to access the server on which Zope is running, so that you can manually restart it later. If you see a "strange" message appear in your web browser when you shut Zope down, don't panic. This is normal. A normal shutdown presents the user with a web page that states:
      An error was encountered while publishing this resource
      exceptions.SystemExit
      Zope has exited normally
      ( .. more output ..)
Controlling the Zope Process From the Command Line
To stop a manually-run Zope on Windows press "Ctrl-C" while the console window under which Zope is running is selected. To stop a Zope on Windows that was run as a service, find the service with the name you assigned to your Zope installed in the Services Control Panel application and stop the service.
To stop Zope on UNIX, press "Ctrl-C" in the terminal window from which you started Zope or use the UNIX "kill" command against the lowest-numbered Zope process id. Zope processes under UNIX will be listed in "ps" output as "python z2.py [ options ]". This process id can also be found in the "var/Z2.pid" file inside of your Zope directory.
Troubleshooting
If your browser fails to connect with anything on TCP port 8080, your Zope may be running on a nonstandard TCP port (for example, some versions of Debian Linux ship with Zope's TCP port as 9673). To find out exactly which URL to use, look at the logging information Zope prints as it starts up. For example:
      ------
      2000-08-07T23:00:53 INFO(0) ZServer Medusa (V1.18) started at Mon Aug  7 16:00:53 2000
              Hostname: peanut
              Port:9673

      ------
      2000-08-07T23:00:53 INFO(0) ZServer FTP server started at Mon Aug  7 16:00:53 2000
              Authorizer:None
              Hostname: peanut
              Port: 8021
      ------
      2000-08-07T23:00:53 INFO(0) ZServer Monitor Server (V1.9) started on port 8099
The first log entry indicates that Zope's web server is listening on port 9673. This means that the management URL is http://peanut:9673/manage.
Certain versions of Microsoft Internet Explorer 5.0.1 and 5.5 have issues with the Zope management interface which manifest themselves as an inability to properly log in. If you have troubles logging in with IE 5.0.1 or IE 5.5, try a different browser or upgrade to IE 6.
If you forget or lose the initial user name and password, shut Zope down and change the initial user password with the zpasswd.py script and restart Zope. See the chapter entitled Users and Security for more information about configuring the initial user account.
Options To The Zope start or start.bat Script
The Zope startup script named start (or start.bat on Windows) has many command-line switch options. They are the same for UNIX and Windows (although some only work on one or the other). These command-line switches are detailed below:
        -h

          Output help text.

        -z path

          The location of the Zope installation.
          The default is the location of the "z2.py" script.

        -Z path

          Unix only! This option is ignored on windows.

          If this option is specified, a separate management process will
          be created that restarts Zope after a shutdown (or crash).
          The path must point to a pid file that the process will record its
          process id in. The path may be relative, in which case it will be
          relative to the Zope location.

          To prevent use of a separate management process, provide an
          empty string: -Z=''

        -t n

          The number of threads to use.  The default is 4.

        -i n

          Set the interpreter check interval. This integer value
          determines how often the interpreter checks for periodic things
          such as thread switches and signal handlers. The Zope default
          is 500, but you may want to experiment with other values that
          may increase performance in your particular environment.

        -D

          Run in Zope debug mode.  This causes the Zope process not to
          detach from the controlling terminal, and is equivalent to
          supplying the environment variable setting Z_DEBUG_MODE=1

        -a ipaddress

          The IP address to listen on.  If this is an empty string
          (e.g. -a ''), then all addresses on the machine are used.

        -d ipaddress

          IP address of your DNS server. If this is an empty string
          (e.g. -d ''), then IP addresses will not be logged. If you have
          DNS service on your local machine then you can set this to
          127.0.0.1.

        -u username or uid number

          The username to run Zope as.  You may want to run Zope as
          a dedicated user.  This only works under Unix.  If Zope
          is started as root, it is a required parameter.

        -P [ipaddress:]number

          Set the web, ftp and monitor port numbers simultaneously
          as offsets from the number.  The web port number will be number+80.
          The FTP port number will be number+21.  The monitor port number will
          be number+99.

          The number can be preceded by an ip address followed by a colon
          to specify an address to listen on. This allows different servers
          to listen on different addresses.

          Multiple -P options can be provided to run multiple sets of servers.

        -w port

          The Web server (HTTP) port.  This defaults to 8080. If this
          is a dash (e.g. -w -), then HTTP is disabled.

          The number can be preceded by an ip address followed by a colon
          to specify an address to listen on. This allows different servers
          to listen on different addresses.

          Multiple -w options can be provided to run multiple servers.

        -W port

          The "WebDAV source" port.  If this is a dash (e.g. -w -), then
          "WebDAV source" is disabled.  The default is disabled.  Note that
          this feature is a workaround for the lack of "source-link" support
          in standard WebDAV clients.

          The port can be preceded by an ip address followed by a colon
          to specify an address to listen on. This allows different servers
          to listen on different addresses.

          Multiple -W options can be provided to run multiple servers.

        -C
        --force-http-connection-close

          If present, this option causes Zope to close all HTTP connections,
          regardless of the 'Connection:' header (or lack of one) sent by
          the client.

        -f port

          The FTP port.  If this is a dash (e.g. -f -), then FTP
          is disabled.  The standard port for FTP services is 21.  The
          default is 8021.

          The port can be preceded by an ip address followed by a colon
          to specify an address to listen on. This allows different servers
          to listen on different addresses.

          Multiple -f options can be provided to run multiple servers.

        -p path

          Path to the PCGI resource file.  The default value is
          var/pcgi.soc, relative to the Zope location.  If this is a dash
          (-p -) or the file does not exist, then PCGI is disabled.

        -F path_or_port

          Either a port number (for inet sockets) or a path name (for unix
          domain sockets) for the FastCGI Server.  If the flag and value are
          not specified then the FastCGI Server is disabled.

        -m port

          The secure monitor server port. If this is a dash
          (-m -), then the monitor server is disabled. The monitor server
          allows interactive Python style access to a running ZServer. To
          access the server see medusa/monitor_client.py or
          medusa/monitor_client_win32.py. The monitor server password is the
          same as the Zope emergency user password set in the 'access'
          file. The default is to not start up a monitor server.

          The port can be preceded by an ip address followed by a colon
          to specify an address to listen on. This allows different servers
          to listen on different addresses.

          Multiple -m options can be provided to run multiple servers.

        --icp port

          The ICP port. ICP can be used to distribute load between back-end
          zope servers, if you are using an ICP-aware front-end proxy such
          as Squid.

          The port can be preceded by an ip address followed by a colon
          to specify an address to listen on. This allows different servers
          to listen on different addresses.

          Multiple --icp options can be provided to run multiple servers.

        -l path

          Path to the ZServer log file. If this is a relative path then the
          log file will be written to the 'var' directory. The default is
          'var/Z2.log'.

        -r

          Run ZServer is read-only mode. ZServer won't write anything to disk.
          No log files, no pid files, nothing. This means that you can't do a
          lot of stuff like use PCGI, and zdaemon. ZServer will log hits to
          STDOUT and zLOG will log to STDERR.

        -L

          Enable locale (internationalization) support. The value passed for
          this option should be the name of the locale to be used (see your
          operating system documentation for locale information specific to
          your system). If an empty string is passed for this option (-L ''),
          Zope will set the locale to the user's default setting (typically
          specified in the $LANG environment variable). If your Python
          installation does not support the locale module, the requested
          locale is not supported by your system or an empty string was
          passed but no default locale can be found, an error will be raised
          and Zope will not start.

        -X

          Disable servers. This might be used to effectively disable all
          default server settings or previous server settings in the option
          list before providing new settings. For example to provide just a
          web server:

            ./start -X -w80

        -M file

          Save detailed logging information to the given file.
          This log includes separate entries for:

            - The start of a request,
            - The start of processing the request in an application thread,
            - The start of response output, and
            - The end of the request.
Environment Variables that Affect Zope at Runtime
Zope behavior is also effected by the presence and value of operating system environment variables that are available in the shell from which Zope is started.
To set an OS environment variable under UNIX in the bash shell, use the "export" command e.g. 'export EVENT_LOG_FILE=/home/chrism/Zope/var/event.log'. To set an OS environment variable under Windows NT/2000, use the Control Panel -> System applet or use the DOS-mode "set" command e.g. 'set EVENT_LOG_FILE=c:\chrism\Zope\var\event.log'. The "set" command can also be used in Windows 98/ME. Below are the environment variables that effect Zope runtime behavior, including descriptions of each:
      Zope library paths

          PYTHONPATH

              Effects the library load path used by Python.  See "The
              Python Tutorial Modules
              Chapter":http://www.python.org/doc/current/tut/node8.html
              for more information about PYTHONPATH.

          INSTANCE_HOME

              If an INSTANCE_HOME is defined and has a 'lib/python' sub
              directory, it will be added to the front of the PYTHONPATH.
              INSTANCE_HOME is usually used to separate the Zope core
              installation from application code and third-party
              modules/products.

              See also: SOFTWARE_HOME

          SOFTWARE_HOME

              The SOFTWARE_HOME usually keeps the directory name of the
              Zope core installation.

              See also: INSTANCE_HOME

          ZOPE_HOME

              ZOPE_HOME is the root of the Zope software, where the
              ZServer package, z2.py, and the default import directory
              may be found.

      Profiling

          PROFILE_PUBLISHER

              If set, Zope is forced profile every request of the
              ZPublisher.  The profiling information is written to the
              value of the PROFILE_PUBLISHER.

      Access Rules and Site Roots

          SUPPRESS_ACCESSRULE

              If set, all SiteRoot behaviors are suppressed.

          SUPPRESS_SITEROOT

              If set, all access rules behaviors are suppressed.

      ZEO-related

          CLIENT_HOME

              CLIENT_HOME allows ZEO clients to easily keep distinct
              pid and log files. This is currently an *experimental*
              feature.

          ZEO_CLIENT

              If you want a persistent client cache which retains
              cache contents across ClientStorage restarts, you need
              to define the environment variable, ZEO_CLIENT, to a
              unique name for the client.  This is needed so that
              unique cache name files can be computed.  Otherwise, the
              client cache is stored in temporary files which are
              removed when the ClientStorage shuts down.

      Debugging and Logging

          EVENT_LOG_FORMAT or STUPID_LOG_FORMAT

              Set this variable if you like to customize the output
              format of Zope event logger.  EVENT_LOG_FORMAT is the
              preferred envvar but STUPID_LOG_FORMAT also works.

          EVENT_LOG_FILE="path" or STUPID_LOG_FILE="path"

              The event file logger writes Zope logging information to a file.
              It is not very smart about it - it just dumps it to a file and the
              format is not very configurable - hence the name STUPID_LOG_FILE.
              EVENT_LOG_FILE is the preferred envvar but STUPID_LOG_FILE
              also works.

              See also: LOGGING.txt in top-level Zope "doc" directory.

          EVENT_LOG_SEVERITY <number> or STUPID_LOG_SEVERITY <number>

              If set, Zope logs only messages whose severity is level is
              higher than the specified one.  EVENT_LOG_SEVERITY is the
              preferred envvar but STUPID_LOG_SEVERITY also works.

          ZSYSLOG="/dev/log"

              Setting this environment variable will cause Zope to try
              and write the event log to the named UNIX domain socket
              (usually '/dev/log').  This will only work on UNIX.

              See also: LOGGING.txt

          ZSYSLOG_FACILITY="facilityname"

              Setting this environment variable will cause Zope to use
              the syslog logger with the given facility. This
              environment variable is optional and overrides the
              default facility "user". This will only work on UNIX.

              See also: LOGGING.txt in top-level Zope "doc" directory.

          ZSYSLOG_SERVER="machine.name:port"

              Setting this environment variable tells Zope to connect
              a UDP socket to machine.name (which can be a name or IP
              address) and 'port' which must be an integer.  The
              default syslogd port is '514' but Zope does not pick a
              sane default, you must specify a port.  This may change,
              so check back here in future Zope releases.

              See also: LOGGING.txt in top-level Zope "doc" directory.

          ZSYSLOG_ACCESS="/dev/log"
          ZSYSLOG_ACCESS_FACILITY="facilityname"
          ZSYSLOG_ACCESS_SERVER="machine.name:port"

              Like ZSYSLOG, ZSYSLOG_FACILITY, and ZSYSLOG_SERVER, but
              controlling the sending of access information to syslog
              (rather than controlling the sending of the event log)

          Z_DEBUG_MODE      "yes" or "no"
          BOBO_DEBUG_MODE   "yes" or "no"  (obsolete)

              Run Zope in "debug mode" if set. Same as -D option
              to 'z2.py' or 'start'.

      Misc.

          Z_REALM       "your realm"
          BOBO_REALM    "your realm" (obsolete)

              Realm to be used when send HTTP authentication requests
              to a web client. The real string is displayed when the
              web browser pops up the username/password requester

      Security related

          ZOPE_SECURITY_POLICY

              If this variable is set to "PYTHON", Zope will use the
              traditional Python based AccessControl
              implementation. By default and for performance reasons
              Zope will use the cAccessControl module.

          ZSP_OWNEROUS_SKIP

              If set, will cause the Zope Security Policy to skip
              checks relating to ownership, for servers on which
              ownership is not important.

          ZSP_AUTHENTICATED_SKIP

              If set, will cause the Zope Security Policy to skip
              checks relating to authentication, for servers which
              serve only anonymous content.

          ZOPE_DTML_REQUEST_AUTOQUOTE

              Set this variable to one of 'no', '0' or 'disabled' to
              disable autoquoting of implicitly retrieved REQUEST data
              that contain a '<' when used in a dtml-var
              construction. When *not* set to one of these values, all
              data implicitly taken from the REQUEST (as opposed to
              addressing REQUEST.varname directly), that contain a
              '<', will be HTML quoted when interpolated with a
              <dtml-var> or &dtml-; construct.

      ZODB related

          ZOPE_DATABASE_QUOTA

              If this variable is set, it should be set to an integer
              number of bytes.  Additions to the database are not
              allowed if the database size exceeds the quota.

          ZOPE_READ_ONLY

              If this variable is set, then the database is opened in
              read only mode.  If this variable is set to a string
              parsable by DateTime.DateTime, then the database is
              opened read-only as of the time given.  Note that
              changes made by another process after the database has
              been opened are not visible.

      Session related

          ZSESSION_ADD_NOTIFY

              An optional full Zope path name of a callable object to
              be set as the "script to call on object addition" of the
              session_data transient object container created in
              temp_folder at startup.

          ZSESSION_DEL_NOTIFY

              An optional full Zope path name of a callable object to
              be set as the "script to call on object deletion" of the
              session_data transient object container created in
              temp_folder at startup.

          ZSESSION_TIMEOUT_MINS

              The number of minutes to be used as the "data object
              timeout" of the "/temp_folder/session_data" transient
              object container.

          ZSESSION_OBJECT_LIMIT

              The number of items to use as a "maximum number of
              subobjects" value of the "/temp_folder" session data
              transient object container.

      WebDAV

          WEBDAV_SOURCE_PORT_CLIENTS

              Setting this variable enables the retrieval of the
              document source through the standard HTTP port instead
              of the WebDAV port. The value of this variable is a
              regular expression that is matched against the
              user-agent string of the client.

              Example::

                  WEBDAV_SOURCE_PORT_CLIENTS="cadaver.*"   enables retrieval
                  of the document source for the Cadaver WebDAV client

      Structured Text

          STX_DEFAULT_LEVEL

             Set this variable to change the default level for <Hx>
             elements.  The default level is 3.

      Esoteric

          Z_MAX_STACK_SIZE

              This variable allows you to customize the size of the
              Zope stack used by the SecurityManager (default 100).
When All Else Fails
If there's a problem with your installation that you just can't seem to solve, don't despair. You have many places to turn for help, including the Zope maillists and the #zope IRC channel.
If you are new to open source software, please realize that, for the most part, participants in the various "free" Zope support forums are volunteers. Though they are typically friendly and helpful, they are not obligated to answer your questions. Therefore, it's in your own self-interest to exercise your best manners in these forums in order to get your problem resolved quickly.
The most reliable way to get installation help is to send a message to the general Zope maillist detailing your installation problem. Typically someone on the "zope@zope.org" list will be willing to help you solve the problem.
For even more immediate help, you may choose to visit the #zope channel on the OpenProjects IRC (Internet Relay Chat) network. See the OpenProjects website for more information on how to connect to the OpenProjects IRC network.
If you are truly desperate and under a time constraint that prohibits you from utilizing "free" support channels, Zope Corporation provides for-fee service contracts which you can use for Zope installation help.
Last modified: 2008/03/28 09:59:40.906000 GMT-4 by
brian.r.brinegar.1
Created: 2006/08/09 12:59:0.837000 GMT-4 by brian.r.brinegar.1.
Categories
- Knowledge Base > Web > Zope